Posts Tagged ‘multiroot’

Liberté toujours – votre archos 53g+ est maintenant libéré!

Friday, July 30th, 2010

Bonjour à tous, voici ci dessous la méthode de hack pour l’archos 5 3g+ SFR :

Nous sommes fier d’aider par cette méthode les utilisateurs d’archos 3g+ abandonnés par SFR en leur donnant la possibilité d’installer le système SDE qu’ils méritent. Nous travaillons dur depuis 1 semaine sur cette release. Elle a été modifiée encore et encore pour la rendre plus sûre et attractive.

Une pétition à été lancée sur le forum SFR, pour demander officiellement une ouverture du firmware. Merci de bien vouloir y participer… Une mise à jour officielle reste la meilleure solution !

ATTENTION, merci de bien vouloir lire attentivement les recommandations suivantes :

Avant de vous lancer, il faut savoir que :

  • Cette manipulation vous fera perdre la garantie sur votre appareil
  • Cette manipulation vous fera perdre les plugins que vous aurez déjà achetés sur votre archos
  • Vous pourrez ensuite racheter ces plugins, mais il sera impossible de les installer de manière officielle sur votre archos
  • VOUS ETES SEUL RESPONSABLES DE VOS MANIPULATIONS !!!
  • Ce hack fera de votre archos 3g+ SFR, un archos 5 3g standard, avec l’interface Angstrom linux.
  • En aucun cas votre appareil sera désimlocké.

Mais le hack est réversible. Vous pourrez repasser sur le système officiel SFR par la suite … ATTENTION BRICK POSSIBLE SI VOUS LE TENTEZ SANS SAVOIR CE QUE VOUS FAITES ! Article à suivre pour le retour sur SFR…

Vous êtes prêts ?

  • Mettez votre archos en charge une heure au moins avant, si la batterie est déchargée, il y a risque de brick !
  • NE JAMAIS éteindre ou mettre en veille l’appareil pendant la procédure, sinon brick !
  • Sauvegardez le contenu de votre archos !
  • Je vous conseille de formater puis de réinstaller le firmware de base, de manière à partir sur une base saine. Dans ce cas, menu restauration, puis format disk, ensuite on colle le fichier aos SFR, puis update…
  • Prenez votre temps, soyez sûrs de vos manipulations, en cas de doute, n’hésitez pas demander de l’aide…
  • Il vous faut la dernière mise à jour officielle SFR, c’est à dire le firmware 1.5.10. Il est installable en wifi en passant par le menu réglages / Logiciels et Plug-ins, puis le bouton Mise à jour du logiciel en ligne. Si vous ne savez pas en quel firmware vous êtes, ce même menu vous donnera l’information. Ceux qui n’ont pas de wifi peuvent le télécharger et l’installer manuellement, en déposant le fichier .aos dans le disque dur par USB, puis en utilisant le bouton Mise à jour du logiciel par le même menu.
  • SUIVEZ SCRUPULEUSEMENT LA PROCÉDURE, n’essayez pas de l’adapter avec d’autres exploits !

On y va :

  • Téléchargez l’archive suivante : https://openaos.org/wp-upload/gen6/sfr/openaos-hack_20100730_0.1.0.tar.bz2
  • Téléchargez le rootfs modifié suivant : https://openaos.org/wp-upload/gen6/archos-sde/rootfs.img.gz (il s’agit de la version SDE, vous pourrez ensuite installer d’autres versions, linux par exemple, mais qui ne sont pas des firmwares archos officiels, donc à vos risques et périls…)
  • Téléchargez le hack DTI suivant : https://openaos.org/wp-upload/gen6/sfr/openaos-dti_20100730_0.1.0.tar.bz2
  • l’archive du hack se retrouve soit dans le dossier /home/votrenom/Téléchargements, soit à l’endroit ou vous l’avez enregistrée.
  • On passe en mode restauration, en éteignant complètement l’appareil, puis on le rallume en laissant le bouton volume – appuyé.
  • On choisit l’entrée repair disk en naviguant avec le bouton de volume, et on valide avec le bouton d’allumage.
  • Une fois en mode repair disk, on branche l’USB.
  • On créé un dossier pour accueillir la partition cachée :

sudo mkdir /media/archos

  • On monte la partition cachée :

sudo mount -t ext3 -o offset=29819404288 /dev/sdc /media/archos/

ATTENTION, sdc correspond à MA configuration, remplacez par la lettre de votre archos, repérable avec la commande :

sudo fdisk -l

  • Un deuxième disque monte sur le bureau, nommé archos, ou media 201 MB
  • Dans le terminal, on navigue vers le dossier où vous avez téléchargé l’archive avec la commande :

cd /home/votrenom/Téléchargements

  • ou à adapter en fonction de l’emplacement de l’archive
  • On “détar” l’archive précédemment téléchargée :

sudo tar xvf openaos-hack_20100730_0.1.0.tar.bz2 -C /media/archos

Voici ce qu’il doit s’afficher dans le terminal :

tar: Taille de l'enregistrement = 8 blocs
openaos/
openaos/flash
openaos/widget_astro.swf
openaos/a5std/
openaos/a5std/boot0_0x00000000
openaos/a5std/boot1_0x00030000
openaos/a5std/init_0x00210000
openaos/a5std/keystore_0x00010000
openaos/a5std/params_0x003f8000
openaos/a5std/recovery_0x00080000
openaos/a5std/logo_0x00060000
openaos/a5sfr/
openaos/a5sfr/boot0_0x00000000
openaos/a5sfr/boot1_0x00030000
openaos/a5sfr/init_0x00210000
openaos/a5sfr/logo_0x00060000
openaos/a5sfr/params_0x003f8000
openaos/a5sfr/recovery_0x00080000
openaos/a5sfr/keystore_0x00010000
openaos/root_telnetd
openaos/dohack.sh

  • Vous devriez avoir un dossier openaos dans /media/archos
  • On rentre dans ce dossier :

cd /media/archos/openaos

  • On lance le hack :

sudo ./dohack.sh

Vous devriez avoir :

openAOS 0.1.0

Utilisez ce script avec précautions !

openAOS ne peut être tenu pour responsable pour une mauvaise utilisation de ce script ou des effets indesirables !
Vous utilisez ce script à vos propres risques !
Il ne peut être utilisez qu'à des fins éducatives !

Le hack de votre archos est activé, suivez la procédure pour la suite...

  • On ressort du dossier :

cd /

  • On démonte la partition cachée :

sudo umount /media/archos

  • Vous pouvez maintenant appuyer sur la touche power de l’archos, ce qui va le faire démarrer normalement.
  • Dans la liste des widgets SFR, bouton sur la gauche, choisissez le widget astro.
  • L’interface va clignoter.
  • Après quelques secondes, le hack fait disparaître l’interface SFR. Il est possible que l’appareil reboot, puis fasse apparaitre le menu archos standard après le reboot… si il reste en reboot infini, éteignez, mode restauration, et recommencez !
  • À partir de ce point, les frileux peuvent s’arrêter. Le hack est en place, et devrait remplacer la page d’accueil SFR à chaque démarrage… Les plus courageux peuvent continuer ;)
  • On active le mode USB, ou on débranche rebranche le câble. L’archos se monte automatiquement, on n’utilise plus la partition cachée pour la suite.
  • On extrait l’archive DTI, qui contient un dossier Games.
  • Maintenant on va copier le dossier Games dans la racine votre archos. Si le dossier existe déjà, vous pouvez le remplacer.
  • Et on en profite pour copier également le rootfs.img.gz dans la racine de la même partition.
  • On débranche rebranche l’USB. l’archos vous demande d’activer l’USB, cliquez sur rester en charge.
  • Attendez de voir l’interface Archos… un reboot automatique est possible.
  • Vous pouvez maintenant aller dans le menu Jouer, Jeux, DTI, ou vous trouverez 4 options : ( créer un profil d’abord, nommer le comme vous voulez, puis charger)
  1. hack pour passer sur le SDE en gardant le logo SFR au boot.
  2. hack pour passer sur le SDE en passant au logo openaos.
  3. hack pour le retour en arrière vers le firmware SFR.
  4. hack pour lancer un telnetd, qui nécessite une connexion wifi établie. (il s’agit d’une option pour utilisateur avancé, ou sur demande d’openaos pour un éventuel débogage !)
  • On clic sur le 1 ou le 2 en fonction de votre envie, mais surtout pas le 3 !!!!!!
  • puis le bouton jouer vert en bas.

  • le flash est en cours, il dure environ 2 minutes, NE TOUCHEZ À RIEN et surtout n’éteignez pas ou ne débranchez pas votre appareil !!! Attendez patiemment, ça peut être plus long… Si l’appareil se met en veille, attention en cliquant, de ne pas lancer un logiciel…
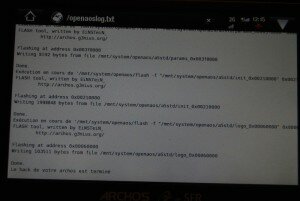
  • ensuite on va ouvrir le document openaoslog.txt, via l’explorateur de fichier, en vérifiant qu’à la fin du fichier il y ai “Le hack de votre archos est terminé”, et qu’il n’y a pas de message d’erreur dans le log. (Vérifiez chaque ligne : si vous trouvez un error: blablabla, venez demander de l’aide !)
  • on reboot….. On croise les doigts, et voilà !!!
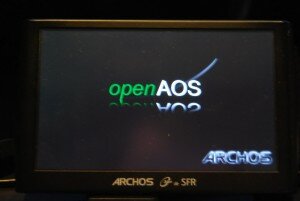
  • Soyez patient au premier boot, l’interface est zippée donc, encore 1 ou 2 minutes…
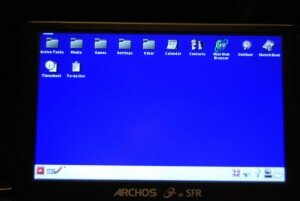
  • et tadaaaaaaaaaaa :

Ne jamais tenter par la suite d’installer ou le firmware SFR ou le frimware Archos standard par le menu de restauration
après l’installation du SDE.  Cela va détruire la flash modifiée, et rendre votre appareil irréparable !

Pour la suite, n’hésitez pas à demander de l’aide sur IRC, #openpma sur irc.freenode.net… Have fun !!

http://dev.openaos.org/wiki/Donations N’hésitez par à faire un petit don pour l’équipe d’openaos… une bière par tête = 2¤ = vraiment pas grand chose pour le boulot effectué !

Les personnes qui ont découvert l’exploit et qui ont préparé le hack complet souhaitent rester anonymes ;)

elmattt travaille sur un screencast complet, qui sera une aide supplémentaire pour la compréhension et l’exécution du hack… à suivre donc !

new openAOS boot menu version for gen6

Wednesday, July 28th, 2010

The plans for this have been quite long in our pipeline but we finally got around to making it happen. As users seem to like to go hence and forth between different Archos firmware versions we were often asked to make this easier. (You have to mount the hidden partition, copy the files, etc. – quite a hassle, especially if you don’t have an Linux PC at hand at the time)

So what we have done now is that before we display the boot menu we also check if the directory ‘openaos/update exists on the FAT32 partition (this is X:\openaos\update for you Windows people). If this is the case then we take everything¹ that is in that directory and copy it over to the hidden partition! Presto! Your Gen6 device just changed its firmware!

This way you can easily switch between e.g. firmware 1.6.54 and 1.7.11 . Some people told us that they do this because of certain features working better on the respective firmware.

All you have to do is install this initramfs together with an regular openAOS zImage like e.g. this from kevin’s r199. You can do this from the SDE menu in Recovery mode.

enjoy!

Thomas, your friendly neighborhood ArchDruid

PS: This comes also handy if you just installed SDE and flashed those two; as during the update procedure it will create the menu.lst correctly and add an AVOS entry if necessary!

¹ Everything in this context means the *cramfs.secure files, the lang* files and the upselling directory of an unpacked firmware. While only the cramfs files are really important in our opinion. – For unpacking firmwares look for ‘aos-tools’.

How to update the Archos Android firmware to 1.9.x under Ångström

Thursday, June 3rd, 2010

UPDATE:

This guide is outdated, please do not use it anymore! There is a new and updated procedure that is easy to follow and also shows you how to update the Archos firmware. The files linked to in this guide will be no longer available.


As you can’t just install the update the regular way (if it would work it would kill at least the boot menu) here are some steps how to update manually. This is only valid for firmware up to the 1.9.x series.

Currently it does NOT work with the 2.0.x firmware because that seems to have a modified Kernel to support the EGL SGX driver. Also if Archos releases an major update to a different Android version (like Eclair) there will be additional steps necessary!

  1. Unpack the Archos update file. Use archutil or aos-unpack (from aos-tools) or abcbox. Sorry for legal reasons we can not provide unpacked firmware.
  2. Boot into Android and via USB copy the previously unpacked androidroot.cramfs.secure and bitmapfs.cramfs.secure and all lang_*.alz files into the main directory of your device. Also copy the contents of the System directory into the System directory on your device. (If you want to use the script in step 7 then copy it too!)
  3. Unmount the device safely. (Else you might damage the files!)
  4. Reboot your A5IT.
  5. The Boot menu should now appear. Select Ångström or just wait 10s.
  6. Once in Ångström press Other then Root shell – a root terminal appears
  7. Now execute the following commands (this should be easy if you have some previous shell experience). Be very careful while typing on the on-screen keyboard. If you have one attach an USB-keyboard.
    • chattr -c /mnt_data/androidroot.cramfs.secure
    • chattr -c /mnt_data/bitmapfs.cramfs.secure
    • mount -t ubifs -o rw ubi0:system /mnt/ubi
    • cp /mnt_data/androidroot.cramfs.secure /mnt/ubi/
    • cp /mnt_data/bitmapfs.cramfs.secure /mnt/ubi/
    • cp /mnt_data/lang*.alz /media/sda2/

    Or use the small script mentioned in step 2:

    • to make it executable just run chmod 755 /mnt_data/update-script
    • and then execute it /mnt_data/update-script
  8. Congratulations you should now have an working 1.9.x firmware!

As already mentioned the openAOS boot-menu currently does not support the EGL SGX firmware 2.0.x . We will start working on adding support for it as soon as we receive updated Linux Kernel sources from Archos.

If you want to switch to the 2.0.x firmware for now – instead of being able to dual-boot – you can just install that firmware from the recovery menu. It will be easy to restore this functionality later. For now installing the SDE is NOT POSSIBLE after installing 1.9.x or 2.0.x as regular firmware updates. So beware, Archos seems to have promised an updated SDE but that might take a bit.

UPDATE: Archos have published an upgraded SDE meanwhile. So going back and forth between SDE, openAOS boot-menu and regular firmware is now again possible.

Cheers,

Thomas, your friendly ArchDruid

PS: I’m sorry, but I’m very busy right now so 2.0.x support might take a while to surface.

PPS: Merci mille fois à Enjolras pour la traduction française!

Follow-up: New kbd layout for e17 wm (beta2 release)

Saturday, May 15th, 2010

As a follow-up post to the Demo build of Enlightenment 17, I have made a new keyboard layout specifically designed for the Archos 5/7’s screen resolution.  I have also addressed a few troubling issues in regards to the illume kbd itself.

List of improvements:

  • The dimensions are now 800×220 so there is more viewing area above the keyboard.
  • Decreased the size of the keys a touch (not a problem since the interpretive skills of illumes kbd are amazing), and increased the font size on the keys themselves
  • Moved the placement/size of the “popup” keys (when a key is initially pressed –the popup display that grows from the current key pressed) to compensate for the new container size.
  • Moved some bottom row buttons around to center the space-bar for easier use with both thumbs.
  • Removed the “Terminal” kbd layout, since it is no longer compatible with the new 800×220 container.
  • Added a keyboard icon to the top shelf (replacing the “qwerty” text).

Some Screenshots:

custom e17 kbd container (800×220)

e17 topshelf keyboard icon

Since I had to recode the illume bits to make changes to the top shelf and the letter sizing/placement, it is necessary to download the new beta version, as opposed to just releasing a .kbd file.  Props go out to raster from #e for some advice on edje  :)

You can download the image  >>>HERE<<<

**note:  I’ll be updating the parent post with the new beta2 build as well.

Note::

[ If you wish to run this along side your current build, rename image to "illume.img" and make the appropriate entry in "menu.lst" Otherwise just overwrite your "rootfs.img" and your good to go.]

As always, input and suggestions are welcome.

~Cheers

Spz0


openAOS Boot-Menu for gen7 Archos devices is here! Get the beta version now!

Monday, April 19th, 2010

UPDATE:

This guide is outdated, please do not use it anymore! There is a new and updated procedure that is easy to follow. The files linked to in this guide will be no longer available.


After spending most of the weekend reimplementing the init-script and cutting out everything that needed Archos binaries I spent this whole monday adapting the bitbake recipes and fixing minor bugs.

Ladies and Gentlemen! I present the public beta version of the openAOS Boot Menu for generation 7 hardware!

The openAOS Boot Menu now runs on 7th generation Archos devices!

The openAOS Boot Menu now runs on 7th generation Archos devices!

As this is just a beta version  (in the true meaning of this word!) some functionality around it is still missing. For now you have to set up most things yourself. For today just a short introduction (prerequisite is an Linux PC and an unpacked Archos Android firmware):

  1. Install the gen7 SDE on your device. Make sure Ångström boots.
  2. Reboot your device while holding down the [VOL -] button.
    • Press the [VOL -] button 5 times to reach the “Developer Edition Menu”. Then Press [Power]
    • Press the [VOL -] button 2 times to reach the “Flash Kernel and Initramfs” entry. Then Press [Power] ONCE. Wait 2 seconds.
    • The screen now should say “connect your device…” – Please do so and mount the device on your desktop PC.
  3. Download those four prepared files into the main directory of your device.
  4. Copy the previously unpacked androidroot.cramfs.secure and bitmapfs.cramfs.secure into the main directory of your device.
  5. Unmount the device safely. (Else you might damage the files!)
  6. Press the [Power] button – The screen will flash briefly and say “Kernel and initramfs updated”.
  7. Press the [Power] button – The device will now reboot.
  8. The Boot menu should now appear. Select Ångström or just wait 10s.
  9. Press Other then Root shell – a root terminal appears
  10. Now execute the following commands (this should be easy if you have some previous shell experience). Be very careful while typing on the on-screen keyboard. If you have one attach an USB-keyboard or see update at the bottom! ;)
    • tar -xvzf /mnt_data/ubitools.tar.gz
    • chattr -c /mnt_data/androidroot.cramfs.secure
    • chattr -c /mnt_data/bitmapfs.cramfs.secure
    • ./ubidetach /dev/ubi_ctrl -m 5
    • ./ubiformat /dev/mtd5 -y
    • ./ubiattach /dev/ubi_ctrl -m 5 -d 0 -O 2048 Make sure you get that right: …-d [ZERO] -[CAPITAL-O]
    • ./ubimkvol /dev/ubi0 -N system -m
    • mkdir /mnt/ubi
    • mount -t ubifs -o rw ubi0:system /mnt/ubi
    • cp /mnt_data/androidroot.cramfs.secure /mnt/ubi/
    • cp /mnt_data/bitmapfs.cramfs.secure /mnt/ubi/
  11. Now reboot the unit and go back into recovery (see step 2, this time select “Access HDD using a PC“)
  12. Connect it to your Linux PC and fire up a partition manager
  13. Make sure you are editing the right drive!
  14. Create an new ext3 partition in the empty space at the end of the drive. Make sure it is created as type primary and is the second partition (e.g. /dev/sdc2)! The unit will not boot Android if the partition is e.g. sdc3 or sdc5!
  15. Now mount that partition and copy some of the remaining contents of the firmware onto it (lang*.alz and the upselling directory)
  16. Unmount the drive and reboot your Archos device.
  17. Congratulations you should now have an dual-booting gen7 device!

The final version will hopefully automate 99% of the above process. If you know some shell scripting and want to help. Please let me know. I won’t have much time over the next few weeks myself.

PS: I should have mentioned that you can of course also generate an script put it onto your device together with the other four files in step 3 and then run it instead of step 10. /bin/sh  script
PPS: I’m working on an clean commit of the sources used to build the files. Please allow me a day or two as I currently have other priority tasks.